How to Pack for a Move: Step-by-Step Packing Guide
Packing is where most moves go wrong — not because people don’t try, but because they start without a plan and run out of time, tape, or patience halfway through the kitchen. This guide breaks the entire process into a clear timeline, walks through every room and item type, and gives you the specific techniques professional packers use to get a three-bedroom home boxed up in a single day.
Whether you’re handling a local move or a long-distance relocation, the principles are the same: start early, work room by room, protect the fragile stuff, and label everything. Use our moving checklist alongside this guide to stay on track.
Your Packing Timeline: When to Pack What
The number one packing mistake is starting too late. Follow this countdown so you’re not panic-boxing at midnight before the truck arrives.
6 weeks out → Declutter aggressively. Go room by room and separate items into keep, donate, and trash. Every item you get rid of now is a box you don’t have to pack, move, or unpack. Sell valuable items online, donate usable goods, and schedule a junk removal pickup for the rest.
4 weeks out → Stock up on packing supplies (see the table below) and start packing rooms you don’t use daily — guest bedrooms, storage closets, the garage, seasonal items, books, and décor.
2 weeks out → Pack the bulk of your home. Kitchen (leave out a few essentials), living room, dining room, home office, kids’ rooms. Disassemble furniture that needs to be taken apart.
1 week out → Pack everything except daily essentials. Defrost the freezer, empty the fridge, and prepare an overnight bag for each family member (phone charger, medications, change of clothes, toiletries).
Moving day → Pack your bedding, bathroom supplies, and final kitchen items. Load your overnight bags into your personal car — not the truck.
→ Short on time? If you’re facing a last-minute move, check our packing hacks guide for shortcuts that save hours — like leaving clothes on hangers in garbage bags and keeping dresser drawers full.
Packing Supplies: What You Need and How Much
Running out of tape at 9 PM on a Sunday is avoidable. Stock up on everything before you start. The table below gives you a rough count based on home size — adjust up for homes with lots of kitchen items, books, or collectibles. For a deeper breakdown of box types and sizes, see our complete guide to moving boxes.
| Supply | Studio / 1BR | 2BR | 3BR+ |
|---|---|---|---|
| Small boxes (books, heavy items) | 10 | 15–20 | 25–30 |
| Medium boxes (kitchen, general items) | 10–15 | 20–25 | 30–40 |
| Large boxes (linens, pillows, light items) | 5–8 | 10–15 | 15–20 |
| Dish pack / glass divider boxes | 1–2 | 2–3 | 3–5 |
| Wardrobe boxes | 1–2 | 2–4 | 4–6 |
| Packing tape (rolls) | 3–4 | 5–6 | 8–10 |
| Bubble wrap (feet) | 50 ft | 100 ft | 150+ ft |
| Packing paper (lbs) | 10 lbs | 15–20 lbs | 25+ lbs |
| Stretch wrap (rolls) | 1 | 1–2 | 2–3 |
| Markers + labels | 2 markers | 3 markers | 4+ markers |
You can purchase supplies individually or save time with Poseidon Moving’s packing material kits, which include everything above in pre-bundled packages sized by home.
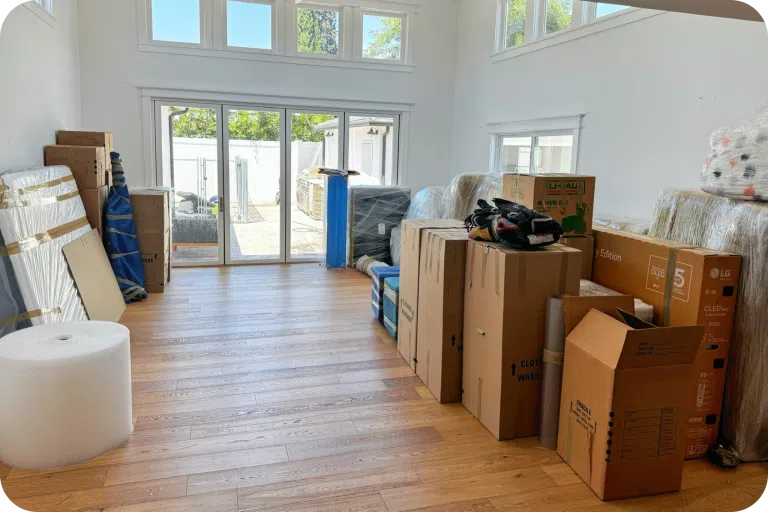
Box Packing Fundamentals
Before you pack a single item, these rules apply to every box in your move:
✔ Heavy items go in small boxes, light items go in large boxes. A large box full of books will weigh 70+ lbs, the bottom will give out, and someone’s going to get hurt. Keep every box under 50 lbs.
✔ Reinforce the bottom of every box. Run an extra strip of packing tape along the bottom seam in an H-pattern (one strip down the center, one across each side). This is the joint most likely to fail.
✔ Fill empty space. Shifting is what breaks things. If there’s room left in a box after you’ve packed it, fill the gaps with packing paper, towels, or clothing. The box should feel solid when you close it — nothing should move when you tilt it.
✔ Label on two sides plus the top. Write the destination room and a brief summary of contents (e.g., “Kitchen — pots & baking sheets”). If the box contains fragile items, write “FRAGILE” and draw an arrow indicating which side faces up.
✔ Don’t overpack or underpack. An overstuffed box won’t close properly and can’t be stacked. An underfilled box will crush under the weight of boxes stacked on top of it.
Kitchen and Dining Room
The kitchen is the hardest room to pack because it’s full of breakable, oddly shaped, and heavy items. Plan for it to take the longest and start here first (after decluttering).
Plates and bowls → Wrap each one individually in packing paper or a dish towel. Stack plates vertically on their edges (like records), not flat — vertical stacking distributes impact force better and significantly reduces breakage. Use dish pack boxes with built-in dividers for best results.
Glasses and stemware → Stuff the inside of each glass with crumpled packing paper, then wrap the outside. Place glasses upside down in a box with dividers. Wine glasses and champagne flutes are especially fragile — wrap the stem separately and add extra cushioning around the base.
Pots, pans, and bakeware → Stack pots with a layer of packing paper between each one to prevent scratching. Wrap lids separately. Baking sheets and cutting boards can be packed vertically in a medium box with cardboard between them.
Small appliances → Use original boxes if you have them. If not, wrap each appliance in bubble wrap, secure cords with rubber bands or twist ties, and pack in a snug box. Blenders, food processors, and stand mixers should have all detachable parts wrapped and packed separately.
Knives → Wrap each blade individually in thick packing paper or a dish towel, then slide into a knife guard, knife roll, or a sturdy box. Label the box “Sharp Objects” on all sides.
→ Double-boxing for long-distance moves: If you’re moving interstate or cross-country, pack your most fragile kitchen items in a box, then place that box inside a slightly larger box with padding in between. The extra layer absorbs road vibration over hundreds of miles.
Electronics and Screens
Electronics are expensive to replace and easy to damage if not packed correctly. The key is keeping screens protected, cords organized, and components together.
TVs and monitors → Original box and foam inserts are ideal. Without them, wrap the screen in a soft blanket or anti-static material, attach foam corner protectors, and slide the unit into a reinforced box as close to the TV’s dimensions as possible. Always transport screens upright, never flat.
Computers and laptops → Back up all data before packing. Wrap laptops in a padded sleeve and pack inside a carry-on bag — keep this with you, not on the truck. Desktop towers should be packed in their original box or wrapped in bubble wrap with extra padding around the hard drive.
Cords and accessories → Before unplugging anything, photograph the back of each setup (TV, gaming console, router, home office) so you have a wiring reference. Label each cord with masking tape and a marker, then coil and place them in labeled ziplock bags. Pack these bags in the same box as the device they belong to.
→ Keep remotes with their devices. Tape the remote to the device itself (or place it in the same box with a note). Reuniting orphaned remotes with their electronics after a move is surprisingly time-consuming.
Furniture, Mirrors, and Wall Art
Furniture is usually the easiest category to damage — not from dropping, but from doorframe dings, surface scratches, and lost hardware during disassembly.
Tables, dressers, and bed frames → Remove legs, shelves, and any detachable parts. Put all screws, bolts, and Allen keys in a ziplock bag and tape it directly to the furniture piece they came from. Wrap surfaces in moving blankets or stretch wrap to prevent scratches.
Mirrors and glass → Apply painter’s tape in an X-pattern across the glass surface — this won’t prevent breaking, but it holds shards together if the glass does crack. Wrap in bubble wrap, add corner protectors, and place in a mirror/picture box. Mark the box “GLASS — FRAGILE” and store it upright, never flat.
Framed artwork and pictures → Use the same painter’s-tape-X method on glass-covered frames. Wrap in bubble wrap, then place inside a flat, reinforced picture box with cardboard between each piece. Always store and transport art upright.
Lamps → Remove the shade and wrap it in packing paper (never bubble wrap — it can leave texture marks on fabric shades). Wrap the base separately in bubble wrap. Pack the shade in its own box with padding so nothing rests on top of it.
Clothing, Shoes, and Personal Items
Clothing is bulky but almost never fragile, which makes it one of the faster categories to pack — and a great source of free padding for everything else.
Everyday clothes → Fold or roll and pack in large boxes or suitcases. Rolling saves more space and reduces wrinkles. Use vacuum-sealed bags for out-of-season items to compress bulk.
Suits, dresses, and formalwear → Use wardrobe boxes with the built-in hanging bar, or place them in garment bags first. For packing a suit in a suitcase, fold the jacket inside-out (lining facing out) to protect the outer fabric, then fold in thirds.
Shoes → Stuff each shoe with packing paper or socks to hold its shape. Pack in original boxes if available, or wrap pairs together in packing paper and line them along the bottom of a medium box.
Toiletries and liquids → Unscrew caps, place a square of plastic wrap over the opening, and re-screw the cap. This prevents leaks. Stand bottles upright in a small box lined with a garbage bag (as a secondary leak barrier). Keep medications in your overnight bag, not on the truck.
Jewelry and small valuables → Thread necklaces through straws to prevent tangling. Use egg cartons or pill organizers for earrings and rings. Pack these in a carry-on bag that stays with you.
Bedding, Linens, and Rugs
Soft items are the easiest things in your house to pack — and they double as padding for everything else.
Blankets, comforters, and sheets → Use vacuum-sealed bags to compress bulky bedding down to a fraction of its size. If you don’t have vacuum bags, fold tightly and pack in large boxes or garbage bags. These also make excellent padding between furniture pieces in the truck.
Pillows → Pack in large garbage bags or vacuum bags. Pillows can fill awkward gaps in the moving truck and prevent other items from shifting.
Rugs → Roll tightly (don’t fold — folding creates permanent creases), secure with stretch wrap or rope, and protect the ends with cardboard. For large area rugs, stand them upright in the truck to save floor space.
Special Items: Plants, Weights, Records, and Collections
Some items don’t fit neatly into a room-by-room system. Here’s how to handle the outliers.
Houseplants → Use breathable containers (open-top boxes or paper bags) and keep them in your personal car if possible, since moving trucks have no climate control. Water plants a day or two before the move — not the morning of — to reduce weight and prevent soil spillage. Note: some states restrict transporting plants across state lines, so check regulations if you’re moving cross-country.
Gym equipment and weights → Use small, reinforced boxes and keep each box well under 50 lbs. Wrap individual weights in towels to prevent them from clanging together and damaging other items. Disassemble anything with removable parts and bag the hardware.
Vinyl records → Pack records upright (like books on a shelf) in small, sturdy boxes. Never stack them flat — the weight causes warping. Keep records in their sleeves and place a piece of cardboard between every 5–10 records for rigidity.
Wine bottles → Pack upright in specialty wine boxes or cell divider boxes. Wrap each bottle in packing paper. If you don’t have dividers, wrap bottles individually and pack them snugly in a small box with no room to shift.
Yard tools → Bundle long-handled tools (rakes, shovels, brooms) together with zip ties or rope. Cover sharp blades with cardboard secured by tape. These can be loaded standing up along the inside wall of the truck.
→ Items movers won’t transport: Hazardous materials (gasoline, propane tanks, paint thinner, batteries, cleaning chemicals with bleach or ammonia), perishable food, and firearms typically cannot go on the truck. Dispose of or transport these yourself. If you need to move unusually heavy items like safes, pianos, or large appliances, ask your movers about specialty handling in advance.
Loading the Moving Truck
How you load the truck matters as much as how you packed the boxes. A poorly loaded truck leads to shifting, crushing, and breakage — even if every box was packed perfectly.
Layer 1 (back wall) → Heaviest items first. Appliances, dressers, bookshelves, and mattresses (stood upright) go flat against the back wall. Use tie-down straps to secure everything so nothing shifts during turns and stops.
Layer 2 → Large and medium boxes, stacked heaviest on the bottom. Fill vertical gaps with rolled rugs, long tools, and floor lamps.
Layer 3 (near the door) → Light boxes, fragile items, and anything labeled “FRAGILE” or “Open First.” These load last so they come off first.
Fill every gap → Pillows, blankets, sofa cushions, and garbage bags of clothing all make excellent gap fillers. Air gaps allow boxes to shift, which is the leading cause of in-transit damage.
→ Mattress care: Use a mattress bag or heavy-duty plastic wrap to protect against dirt, moisture, and tearing. Mattresses should be stood upright and strapped securely — laying them flat with boxes stacked on top can damage the springs or foam.
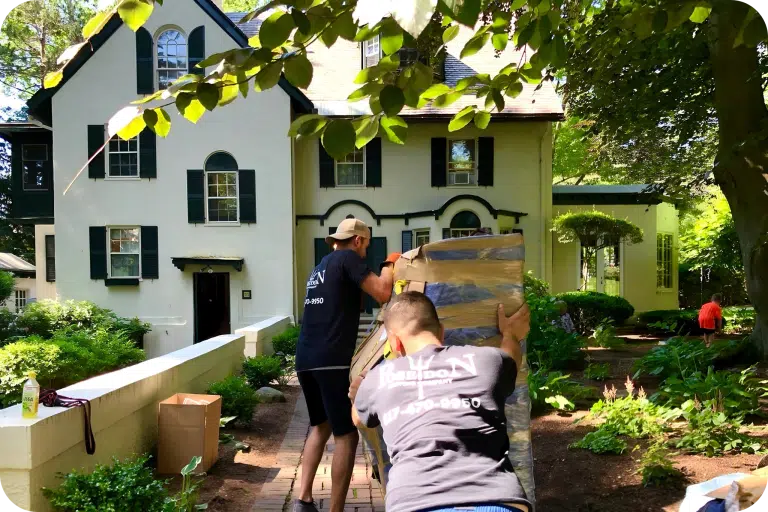
Let Professionals Handle the Packing
Packing a full home takes most people 2–3 weekends. Our crews do it in a day — with professional-grade materials and techniques that keep everything protected during transit. Poseidon Moving offers full and partial packing services for local, long-distance, and interstate moves. We wrap, box, label, and load — you focus on everything else.
Request a free quote and tell us what you need — whether it’s the whole house or just the kitchen and china cabinet.